Create your own drum loops, and you won’t have to settle for what other people think would work well with your music
Sure, there are some great sample libraries and virtual instruments available with fabulous drum loops. But it always seems that I want to customize them, or do something like add effects to everything but the kick drum. Fortunately, many libraries also include samples of the individual drums used to create the loops, so you can always stick ’em in your sampler and overdub some variations. But frankly, I find that process a little tedious, and decided that it would be easier (and more fun) in the long run just to make my own customizable drum loops. However, there’s more than one way to accomplish that task; I tried several approaches, and here are some that worked for me.
ASSEMBLING FROM SAMPLES
For loops you can edit easily, simply import one-shot samples into your DAW of choice, arrange them as desired at whatever tempo you’d like, bounce them together to create loops, then save the bounced tracks as WAV or AIFF file types for use in tunes. Although you can create loops at any tempo, if you plan to turn them into “stretchable” loops with Acidization or REX techniques, I recommend a tempo of 100 BPM (see the post How to Create Loops from Audio File). Let’s go through the process, step-by-step.
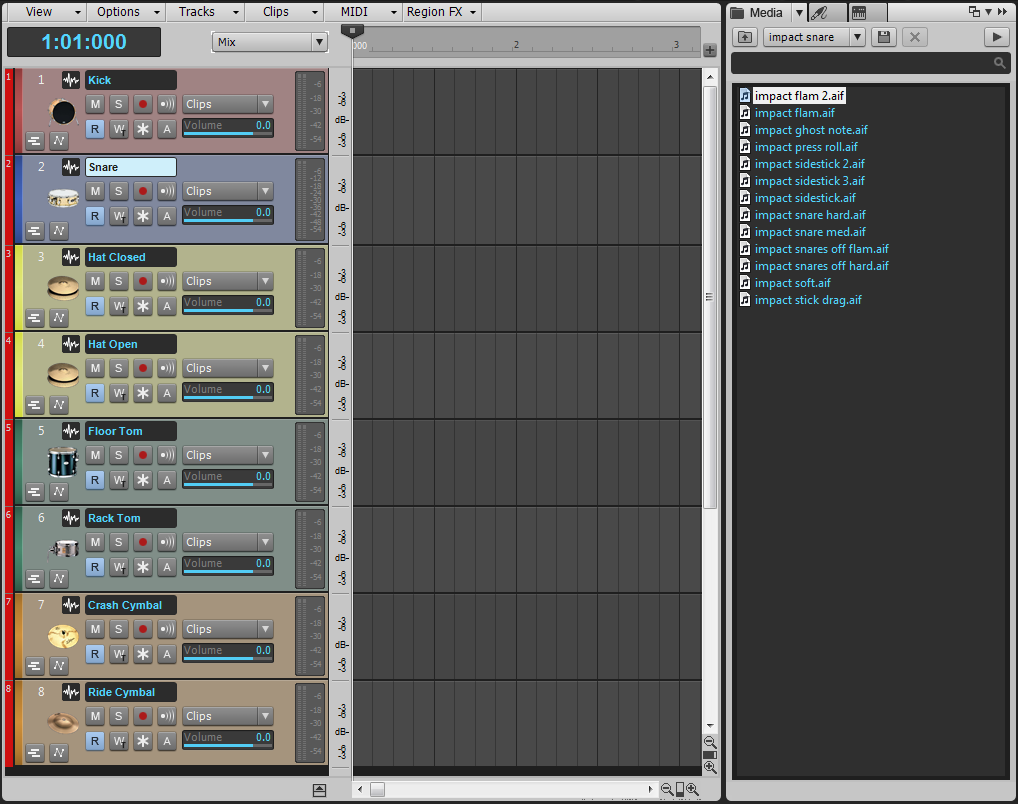
1. Collect the drum samples for your loop (Fig. 1) and create the tracks to hold them. Before bringing in any samples, consider saving this project as a template to make life easier if you want to make more loops in the future.
2. In your DAW, set the desired tempo and “snap” value (typically 16th notes, but your mileage may vary). Even if you plan to “humanize” drum hits instead of having them snap to a grid, I find it’s easier to start with them snapped, and then add variations later.
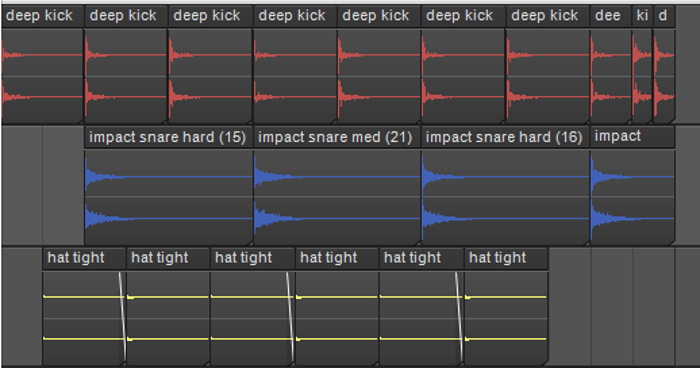
3. Import and place samples (Fig. 2).
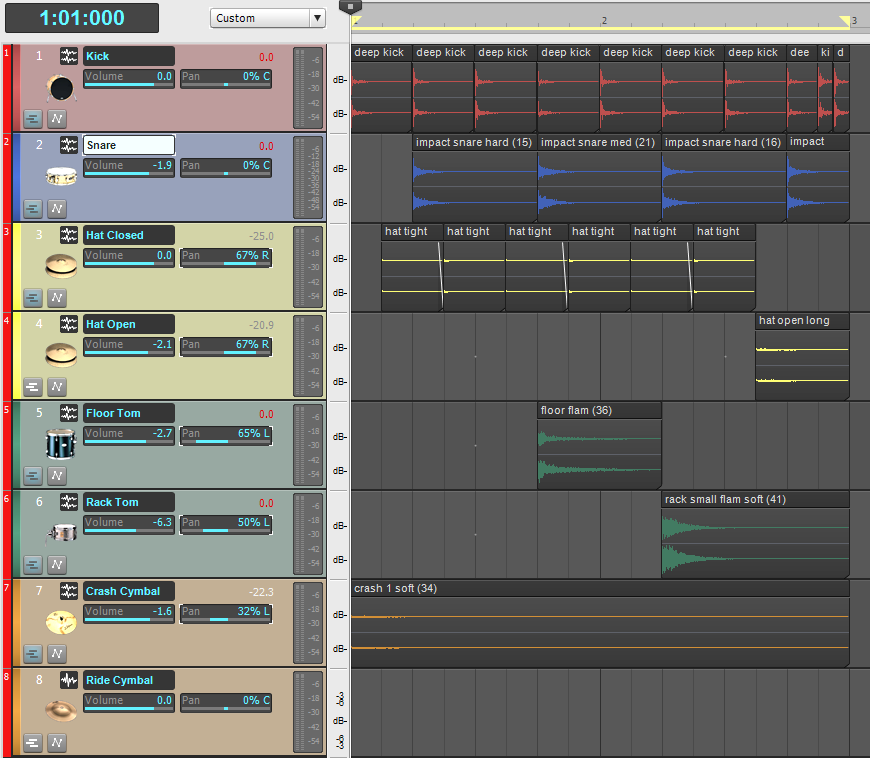
I prefer to place each sound on its own track, although sometimes it’s helpful to spread the same sound on different tracks if specific sounds need to be processed together. For example, if you have a techno-type loop with a 16th note high-hat part and want to accent the hats that fall on each quarter note, place these on their own track while the other hats go on a separate track. That way it’s easy to lower the level of the non-accented hats without affecting the ones on the quarter notes.
4. Bounce and save. This is the final part of the process. One option is to simply bounce all parts together into a mono or stereo track that you can save as a WAV or AIFF file. But I also make a stereo mix of all sounds except kick in case I want to replace the kick in some applications, or add reverb to all drums except the kick. I’ll often save a separate file for each drum sound as well, and all these variations go into a dedicated folder for that loop.
THE VALUE OF VARIATIONS
The advantage of giving each sound its own file is that it allows lots of flexibility when creating variation loops. Here are a few examples:
- Slide a track back and forth a bit in time for “feel factor” applications. For example, move the snare ahead in time for a more “nervous” feel, or behind the beat for a more “laid back” effect.
- Change pitch in a digital audio editor (this assumes you can maintain the original duration) to create timbral variations.
- Copy and paste to create new parts. For example, a common electronica fill is to have a snare drum on every 16th note that increases linearly in level over one or two measures. If a snare is on 2 and 4, you can copy and offset the track until you have a snare on every 16th note. Premix the tracks together, fade in the level over the required number of measures, and there’s your fill.
- Drop out individual tracks to create remix variations. Having each sound on its own track makes it easy to drop out and add in parts during the remix process.
- Create “virtual aux buses” by bouncing together only the sounds you want to process. Suppose you want to add ring modulation to the toms and snare, but nothing else. Mute all tracks except toms and snare, premix them together, import the file into a digital audio editing program capable of doing ring modulation, save the processed file, then import it in place of the existing tom and snare tracks.
TRICKS WITH COMPLETE LOOPS
After you have a collection of loops, it’s time to string them together and create the rhythm track. Here are some suggested variations.
- Copy a loop, then transpose it down an octave while preserving duration. This really fattens up the sound if you mix the transposed loop behind the main loop.
- When trying to match loops that aren’t at exactly the same tempo, I generally prefer to shift pitch to change the overall length rather than use time compression/expansion, which usually messes with the sound more (especially with program material). This only works if the tempo variation isn’t too huge.
- Take a percussion loop (e.g., tambourines, shakers, etc.) that’s more accent-oriented than rhythmic, then truncate an eighth-note or quarter note from the beginning. Because the loop duration will be shorter than the main loop, it repeats a little sooner each time the main loop goes around, thus adding variations. If you can’t loop individual tracks differently, then copy and paste the truncated loop and place the beginning of the next loop up against the end of the previous loop.
- Copy, offset, and change levels of loops to create echo effects. Eighth and sixteenth-note echoes work well, but sometimes triplets are the right tool for the job.
APPLIED LOOPOLOGY
Of course, using drum loops can get a lot more involved than this, such as mixing and matching loops from different sample libraries and such. However, one problem is that loops from different sources are often equalized differently. Now’s a good time to use your digital audio editor or DAW’s spectrum analysis option to check the overall spectral content of each loop, so you can quickly compensate with equalization. Sure, you can do it by ear too, but spectrum analysis can sometimes save you some time by pointing out where the biggest differences lie.
Well, those are enough tips for now. The more creative you get with your loops, the more fun you (and your listeners) will have. Happy looping! looping! looping! looping! looping! looping!