When it comes to DAWs, there are more effects routing options than just insert effects
The most common way to add plug-ins is as series insert effects—the track’s audio goes through the effect, then into the DAW’s mixer. However, using send effects can provide additional options, like parallel processing.
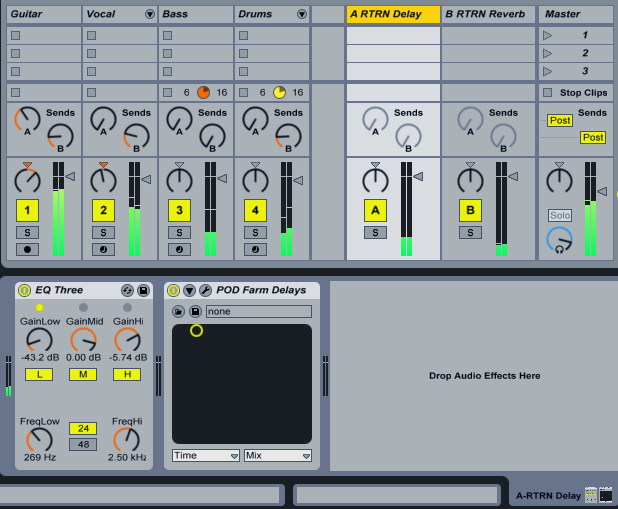
Audio tracks use send controls to “pick off” some of the track’s audio and send it to a bus. An effect inserted in that bus processes any audio it receives. The classic send effect application is reverb, where different tracks send different amounts of audio to the send reverb effect—for example, if you want lots of reverb on voice and guitar but not bass, you’d turn up the voice and guitar track send controls that feed the reverb bus, while leaving the bass’s send control down. The send bus output re-enters the DAW’s mixer via a Return channel or track (Fig. 1).
Sends typically can be pre- or post-fader. With post-fader selected, reducing the track’s main fader simultaneously reduces the send level. With pre-fader, only the send level control determines the send level, independently of the track fader’s setting.
How to Set the Wet/Dry Mix with Send Effects
When using effects with wet/dry balance controls (like reverb or delay) as send effects, remember that this effect is in parallel with the track feeding it. As the original track is feeding the DAW’s mixer with a dry signal, you’ll usually set the send effect for wet sound only, then use the return track’s level control to balance the amount of wet signal with the original track’s dry signal.
Send Effects Applications
Sends are an easy way to create parallel effects, so any parallel effects applications work well. Such as…
- Use a send effect for wah or envelope-controlled filter. This prevents “thinning out” the main guitar track.
- With bass, keep the full, round bass sound in the main track, and send some audio to processors like distortion, chorus, wah, etc.
- Send effects can help provide stereo imaging. Use two send effects with short delays (like 13ms and 17ms), then pan one send right and the other left. This adds width and ambience. Then, these two sends could feed another send that feeds reverb, thus adding a room or hall sound. Just remember it’s a good idea check the output in mono to make sure there’s no cancellation due to the short delays.
- If you have a chain of hardware effects, most DAWs have “external effect” plug-ins that can feed a track or send’s audio to an interface output. This patches to the hardware effects, whose output returns to a spare audio interface input. Although this is usually implemented as an insert effect, it works just as well for sends.
- Send effects make it easy to maintain consistency with doubled parts. Rather than trying to set up insert effects identically for each part, simply create one send effect, and send audio from each doubled part to the send bus.