To tweak reverb parameters, you need to know what they do
Unless you have space for a concrete room, or a convenient elevator shaft, you’re going to end up using some kind of reverb processor. Fortunately, digital reverb keeps getting better and better, as computing power increases and the algorithms used to emulate reverb become more refined.
Digital reverbs also offer more control than ever over the reverb characteristics—certainly far more than what you can do with acoustic reverb space. A sophisticated reverb can even have dozens of parameters, which can sometimes be overwhelming you’re trying to optimize reverb for specific recording situations. So, we’ll investigate how the various parameters affect your sound, along with tips on maximizing the potential of whatever reverb you use.
REVERB COMPONENTS AND BASIC TERMS
Reverb tries to approximate the sound of a seemingly infinite number of waves bouncing around a reverberant space. Usually, it treats the reverb as having two main elements: the initial reflections consisting of the first group of echoes that occur when sound waves hit walls, ceilings, etc., and the decay caused by these waves continuing to bounce around (Fig. 1). Following are some of the parameters found in higher-end reverbs; less expensive reverbs will likely have a subset of these parameters.

Damping. If sounds bounce around in a hall with hard surfaces, the reverb’s decay tails will be bright and “hard.” With softer surfaces (e.g., wood instead of concrete), or a hall packed with people, the reverb tails will lose high frequencies as they bounce around, producing a warmer sound. If your reverb has a tough time producing a silky smooth high end, introduce some damping to place the focus more on the midrange and lower frequencies.
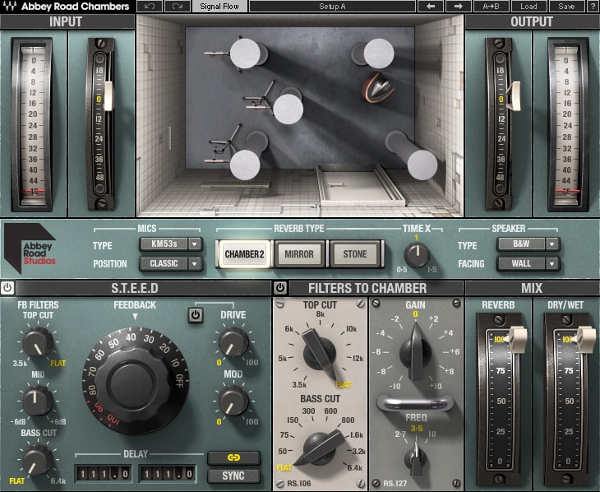
High and low frequency attenuation. These parameters restrict the frequencies going into the reverb. If your reverb sounds metallic, try reducing the highs starting at 4 – 8 kHz. Remember, many of the great-sounding plate reverbs didn’t have much response above 5 kHz, so don’t worry if your reverb doesn’t do great high frequency sizzle—it’s not crucial.
Reducing low frequencies going into reverb reduces muddiness; try attenuating from 100 – 300 Hz on down.
Early reflections diffusion (sometimes just called diffusion). Increasing diffusion pushes the early reflections closer together, which thickens the sound. Reducing diffusion produces a sound that tends more toward individual echoes than a wash of sound. For vocals or sustained keyboard sounds (organ, synth), reduced diffusion can give a beautiful reverb effect that doesn’t overpower the source sound. On the other hand, percussive instruments like drums work better with more diffusion, so there’s a smooth, even decay instead of what can sound like marbles bouncing on a steel plate (this can be a characteristic of budget reverbs).
The reverb tail itself may have a separate diffusion control (the same general guidelines apply about setting this), or both diffusion parameters may be combined into a single control.
Room size. This affects whether the paths the waves take while bouncing around in the virtual room are long or short. If the reverb sound has flutter (a periodic warbling effect), vary this parameter in conjunction with decay time (described next) for the smoothest sound.
Decay time. This sets how long it takes for the reflections to run out of energy. Remember that long reverb times may sound impressive on instruments when soloed, but rarely work in an ensemble context (unless the arrangement is sparse).
Early reflections predelay. It takes a few milliseconds before sounds hit the room surfaces and start to produce reflections. This parameter, usually variable from 0 to 100 ms or so, simulates this effect. Increase the parameter’s duration to give the feeling of a bigger space; for example, if you’ve dialed in a large room size, you’ll probably want to add a reasonable amount of pre-delay as well.
Reverb density. Lower densities give more space between the reverb’s first reflection and subsequent reflections. Higher densities place these closer together. Generally, I prefer higher densities on percussive content, and lower densities for vocals and sustained sounds.
Early reflections level. This sets the early reflections level compared to the overall reverb decay. Balance these reflections so that the early reflections are neither obvious, discrete echoes, nor masked by the decay. Lowering the early reflections level also places the listener further back in the hall, and more toward the middle of a space.
High frequency decay and low frequency decay. Some reverbs have separate decay times for high and low frequencies. These frequencies may be fixed, or there may be an additional crossover parameter, calibrated in Hz or kHz, that sets the dividing line between low and high frequencies.
These controls have a huge effect on the overall reverb character. Increasing the low frequency decay creates a bigger, more “massive” sound. Increasing high frequency decay gives a more “ethereal” type of effect. With few exceptions this is not the way sound works in nature, but it can sound very good on vocals as it adds more reverb to sibilants and fricatives, while minimizing reverb on plosives and lower vocal ranges. This avoids a muddy reverb effect, and doesn’t compete with the vocals.
USING DIFFERENT REVERBS ON DIFFERENT SOURCES
I often use reverb to simulate an acoustic space rather than serve as an obvious effect. Therefore, I avoid using different reverbs on different tracks, preferring instead to put reverb in an aux bus, and use different send amounts to place the sound source in the reverberant space (more send places the sound further back; less send places it more up front). The settings will generally be fairly high diffusion coupled with fairly high damping. The one exception I’ll make is with vocals, which often benefit more from a bright, plate-like sound with less diffusion and damping. In general I’ll send some vocal into the room reverb, and some into the “plate,” which gets mixed at a level that hopefully causes it to blend well with the room sound.
COMBINING PHYSICAL REVERB AND DIGITAL REVERB
Digital reverbs are weakest at creating realistic first reflections. If you have something like a tile bathroom, basement with hard concrete surfaces, or even just a room with a tiled floor, you can get some great reverb effects by sticking a speaker in there, and feeding that with an aux bus output. Then use a mic to pick up the reflections. Blend in these real first reflections with the decay from a digital reverb, and the result will sound more like a real reverb chamber.
REVERB PLUG-INS VS. REVERB HARDWARE
Although reverbs always present a cost-vs.-complexity tradeoff, the requirements for plug-in reverbs are particularly stringent. It’s easy to write a great reverb algorithm if you’re willing to hog a lot of CPU cycles, and it’s easy to write a very efficient reverb as long as you don’t mind it sounding dreadful. The hard part is writing a plug-in that’s efficient and sounds great.
Sometimes it’s best to just go outside of your digital system, use an analog output to feed a hardware reverb box (or a digital out if your reverb can accept it), then bring the reverb sound back in through a spare input. If the reverb has analog I/O, this will create a delay caused by the computer’s latency, but this usually isn’t a problem—think of it as a free, short predelay.
COMBINING REVERBS FOR BETTER SOUND QUALITY
Before closing, here’s another useful trick. I have yet to find a way to make a bad reverb plug-in sound good, but there is a way to make a good reverb plug-in sound even better: “double up” two instances of reverb (each on their own aux bus), set the parameters slightly differently to create a bigger stereo image instead of a point source, then pan one reverb somewhat more to the left and the other more to the right.
The proper use of reverb can make or break a recording: too much, and the sound ends up indistinct but too little, and the recording will sound dry and possibly even a bit sterile. We’re used to hearing sounds in an acoustic space—and digital Reverbreverb can emulate that space for us.