Today’s digital reverbs can do a whole lot more for guitar than spring reverbs
The days when reverb for guitar meant springs, and a single control to mix some spring sound in with your dry guitar, are gone. Sure, we still have spring options—and let’s face it, some spring reverb plug-ins are excellent—you have many more choices in today’s digital landscape. Let’s cover some digital reverb tweaks that are particularly useful for guitar.
REVERB DAMPING
High frequencies decay faster because they’re more readily absorbed by people, fabric, etc. than lower frequencies. If you’re using a lot of high-frequency decay and want a natural sound, increase the amount of damping to reduce highs as the sound progresses.
PRE-DELAY
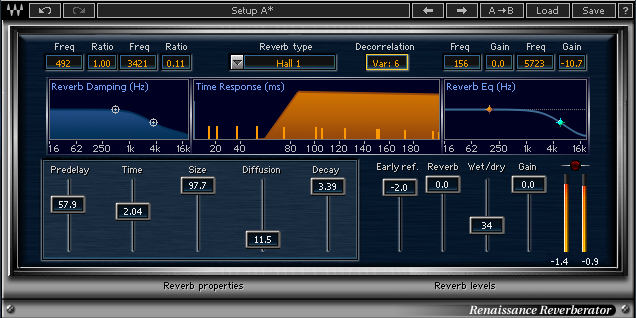
This emulates the time between a sound occurring in a room, and how long it takes to hit surfaces and start creating reflections. With lead guitar, a short pre-delay (50-100 ms) keeps the reverb from “stepping on” note attacks, which maintains their definition and gives the lead more clarity in the mix (Fig. 1).
REVERB DIFFUSION
Reflections create even more reflections; diffusion (sometimes in conjunction with a density parameter) controls how these reflected echoes build up over time. More diffusion imparts a thicker sound, with more “bloom” as the reverb decays.
The easiest way to hear how this affects sound is with a dry snare hit, clave, or similar highly percussive sound. Low density spaces the echoes further apart, giving a “marbles bouncing on steel plate” effect. Higher densities smooth out the sound more as it decays. With sustaining sounds, like voice and lead guitar, lower densities are often preferable because for a given decay time, they apply reverb more sparingly. But with percussively strummed acoustic guitar, moderate density can add a richness that fills in the spaces between the sharp note attacks.
HIGH AND LOW FREQUENCY DECAY
Many reverbs have separate decay controls for the high and low frequencies, with additional control that sets the crossover frequency. Optimum settings depend on what’s happening in the mix. With a busy mix and a languid, David Gilmour-style lead line, you’ll probably want more high-frequency decay—the reverb will “float” above the mix, which imparts an extra degree of ambience.
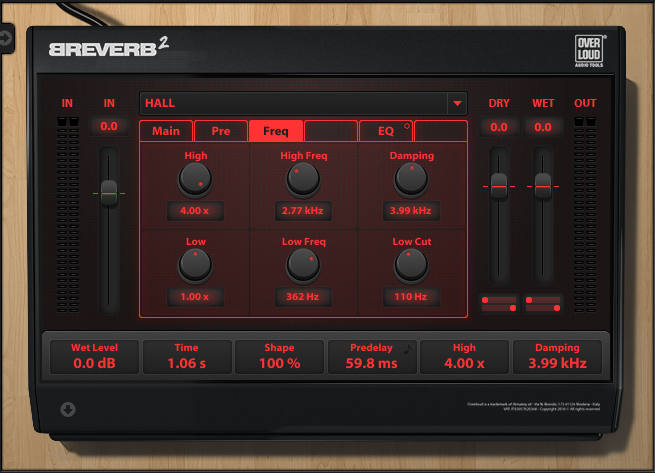
In the featured image above, the Freq tab in Overloud’s Breverb 2 provides the option to separate high and low-frequency decays and their respective cutoff frequencies. There are also damping controls, and a low cut option to reduce “mud.”
For rhythm guitar, emphasizing the lower mids can increase the low-end power. However, it’s important that other instruments, like the lower range of a piano, don’t compete for the same sonic space.
CONVOLUTION VS. SYNTHETIC REVERB
Convolution reverbs measure a room’s characteristics, and apply those characteristics to your signal. Synthetic reverbs use algorithms to model the sound of a room—more like impressionistic art compared to convolution reverb’s “photograph.” My rule of thumb is if you want to sound like you’re playing in a physical space, use a convolution reverb. For more of a tweakable “effect,” try synthetic reverb (although it’s capable of highly realistic sounds as well).