Use Rig Kontrol 3 with today’s recording software and operating systems
You can often find older, “unsupported” gear for cheap—yet it works just fine with today’s computers. Native Instruments Rig Kontrol 3 is a cool foot controller with 8 footswitches, a pedal, and an ASIO audio interface that you can often pick up in the $125 – $150 price range on places like reverb.com. Here’s how to get it working with the 64-bit version of Windows 10 (I believe it also works with the 32-bit version, but haven’t tested it.
DOWNLOAD AND INSTALL THE SOFTWARE
1. First of all, don’t plug the RK3 into a USB port until you’ve installed the Native Instruments driver! Windows will think it needs to install a driver, and the one it installs won’t work properly. If you make this mistake, keep the pedal plugged in, open Device Manager, scroll down to Universal Serial Bus devices, right-click on Rig Kontrol 3, and choose uninstall. Restart the computer but immediately after the computer begins to restart, unplug Rig Kontrol 3 so you can start over.
2. Go to Native Instruments’ Drivers and Other Files support section. Download the most recent (and last) Rig Kontrol 3 driver, version, 3.1.0. Although there’s no mention of supporting Windows 10, it does.
3. Also download Controller Editor version 1.7.4, the last version to support Rig Kontrol 3. If you have a newer Controller Editor in your computer, installing 1.7.4 will overwrite it. So, rename the current Controller Editor folder (e.g., Controller Editor 2.6) and to be safe, also rename the Controller Editor.exe file in the folder.
4. Don’t plug in RK3 yet. Install the driver and then Controller Editor 1.7.4. In your Start menu, you’ll see Rig Kontrol 3 under Native Instruments. This is where you choose the audio settings.
USING RIG KONTROL 3
1. Open Controller Editor 1.7.4.
2. Connect the RK3 to USB. It’s best to have a direct connection to your computer’s motherboard—no hub, and no USB extension cord.
3. After a few seconds, the Controller Editor application should recognize RK3. Once the Connect button is outlined in orange, click on it. The RK3 LED display should show con.
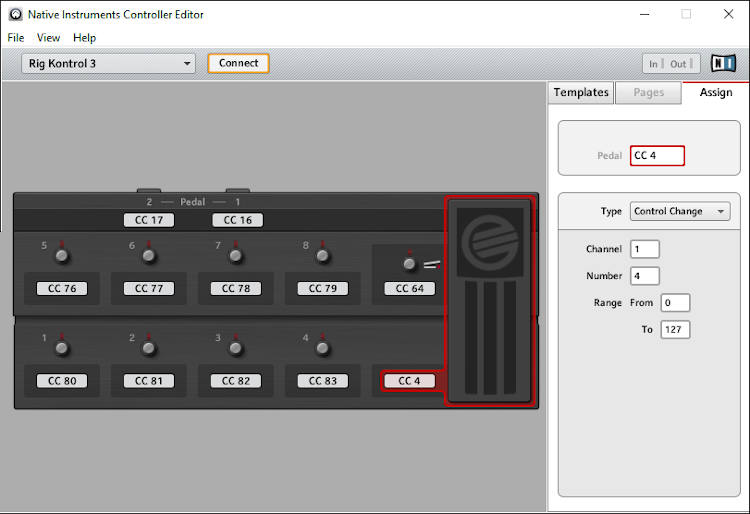
4. Click on the Assign tab, then click on a footswitch you want to assign. Here you can assign the footswitches as desired, and not just to controllers—there are options for program changes, start, stop, etc. Cool stuff!
5. You also need to calibrate the footpedal, or it won’t work. Choose File > Preferences, and click on the Controller tab. Click on Recalibrate and move the pedal up and down a few times. If you have other expression pedals connected, move them up and down as well.
Done! Now you have a functioning Rig Kontrol 3 to use with your DAW of choice. If later on it seems the RK3 isn’t connecting to your system, open Controller Editor 1.7.4, choose Rig Kontrol 3 (it’s under the Komplete file tree), click Connect, and all should be well.
If this doesn’t work for you, don’t give up! The Gods of USB can be fickle, and you may need to find an optimum order for using RK3. What works for me is booting the computer without RK3 plugged in, opening the Controller Editor, plugging in RK3, then clicking on the Controller Editor’s Connect button.