This physically modeled bass can be super-responsive – if you know how to make it respond
IK Multimedia’s MODO modeled bass virtual instrument doesn’t use sampling, but instead models a variety of bass sounds—and does so very realistically. Like any instrument, though, it’s up to us to translate that true-to-life technology into realistic, expressive parts.
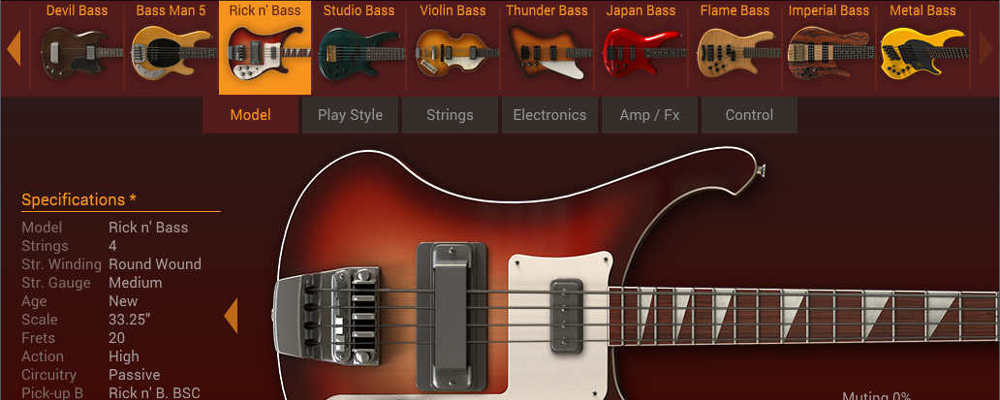
Initially, MODO Bass can be a little daunting. You can control just about everything, even down to the age of strings. You can mix and match pickups (no soldering iron required), and there are keyswitching options to add a variety of articulations. Fortunately, it’s not necessary to know everything to make great music—for many people, just using the presets will do what they need. However, if you dig a little deeper and go beyond the presets, you can find ways to make your bass parts even more satisfying. The following are some of my favorite tips on how to get the most out of this innovative bass instrument.
INCREASE REALISM BY LEAVING SPACES BETWEEN NOTES
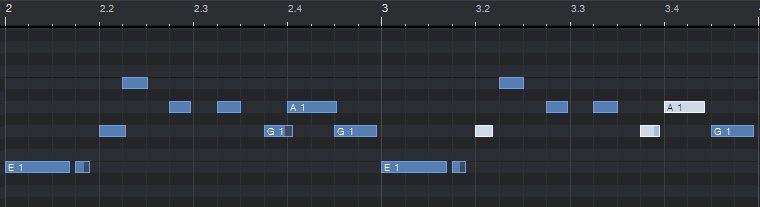
A real bass line has a pause, no matter how slight, between plucked notes. This is because you need to move your finger to the note, then pluck it. If you look over a bass part for overlapping notes and pull back note durations that extend over other notes, you’ll hear a more realistic bass line (Fig. 1).
USING KEYBOARD BASS TO CREATE AN “IDEALIZED” BASS SOUND
Although I play electric bass, I often prefer playing keyboard bass using basses I’ve sampled and edited. This is because I want more of an “idealized” bass sound—sort of like the difference between CGI computer graphics and real life objects. Although an obvious advantage of MODO bass’s modeling technique is realism, it’s possible to remove all the variables, and create an idealized bass sound. Here’s how:
Play Style Tab: Set Detach Noise and Slide Noise to 0.0.
Strings: Set Action to High and Gauge to Heavy so there’s no buzzing or fretting out.
For example, a sampled Rickenbacker bass often includes the “character” of slide noise and buzzes for realism. The MODO Bass Rickenbacker models these same elements, but you can remove them. Try the above settings, and now you have a cross between a Rickenbacker and a sound that’s more like a synthesizer bass.
THE IMPORTANCE OF “TOUCH” AND DYNAMICS
One factor that separates pro bass players from amateurs is their touch—how consistently they apply dynamics when they play. MODO may not have real strings, but its modeled strings respond to touch via MIDI velocity.
The instrument itself has several touch-oriented options, accessed via the Play Style tab (Fig. 2).

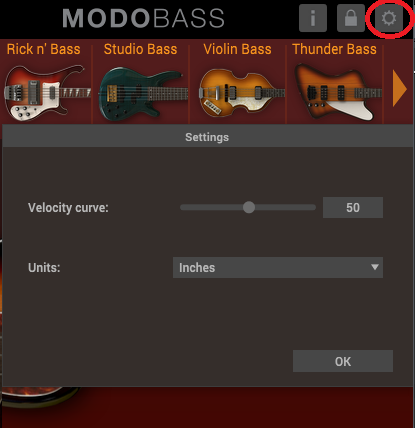
However, don’t overlook the Velocity Curve option, which you access through the system settings (Fig. 3). This helps ensure that whether you have a heavy or light touch, the MODO Bass touch settings will respond as expected to your specific touch.
An easy way to fake a consistent touch is to compress the MODO Bass audio output, but then it sounds compressed and the string tones will be inconsistent. It’s better to get touch right at the source, which you can do in your sequencer program.
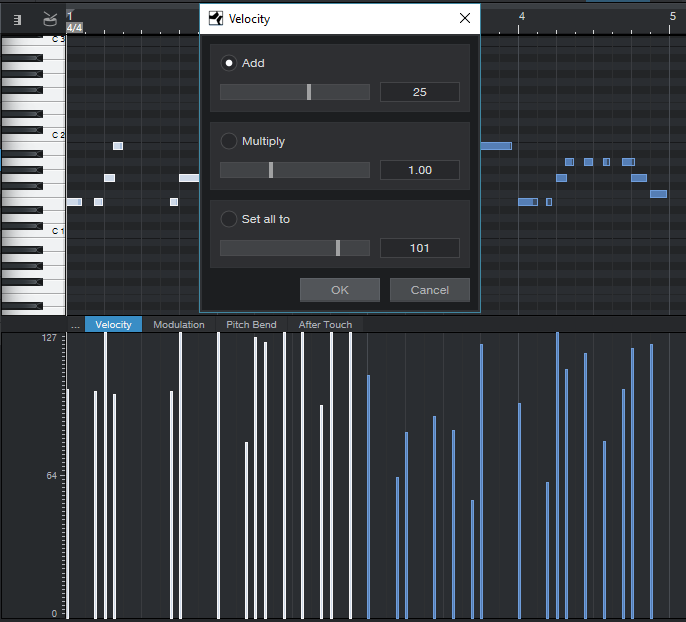
To do the equivalent of limiting for a more uniform touch, add a constant to all velocity values. The high velocity values can’t exceed 127, but “limiting” the MIDI data will bring up lower velocity levels and give a more consistent output (Fig. 4). Some programs also include ways to compress the MIDI values, but I find limiting to be more appropriate in most cases.
SLIDES ADD REALISM TO BASS PARTS
Slides are a crucial part of playing bass, and there are two ways to do slides with MODO bass.
Pitch Bend Wheel
This produces a slide, but IK had the forethought to quantize slides to semitones and make it sound like you’re sliding over frets. (I used to spend hours sampling bass slides for sampled bass instruments so they’d sound realistic. I’m glad I don’t have to do that any more.) Set the maximum range with the Slide Range knob toward the top of the Control page; I like 12 semitones. However, note that downward bends are limited by the position in which you’re playing—you can’t slide lower than where the nut would be, which makes sense.
Legato Slide
You choose the trigger for this on the Control page, using either a keyswitch or a MIDI controller. If you play in legato mode (i.e., you hit a new note while another note is held down), the bass slides up to the new note and stays there for as long as the note’s held down. If you release the new note while the original note is still held down, the bass slides back down to the original note. There are few points to keep in mind:
- This works only for sliding up and down, not down and then up. In other words if you hit a new note that’s lower in pitch than the note being held down, there’s no slide.
- The harder you hit the new note, the faster the slide—the slide’s speed corresponds to velocity.
- It’s easier to hit the end note of a slide precisely compared to using the pitch bend wheel, because you play the actual target note for the slide’s end.
- Many players set the pitch bend Slide Range to a relatively small value, like two semitones, because it’s easier to hit pitches precisely with the pitch bend wheel. Legato Slide can override this—you can slide, for example, an octave with Legato Slide even if the Slide Range knob for the pitch wheel is set to something like 2 semitones.
- It takes some practice to master legato slides, but once you get good at it, you might leave it on all the time to take advantage of doing not just dramatic, long slides, but those little slides up a few semitones to the next note. For this application, a momentary footswitch sending out the MIDI controller you use as a trigger is ideal.