Studio One 4.5 didn’t add an official fill creator…but it has one, so use it!
I like anything that kickstarts creativity, and gets you out of a rut—which is what this post is all about. And, there’s even a bonus tip about how to create a Macro to make this process as simple as invoking a key command.
Here’s the premise. You have a MIDI drum part. It’s fine, but you want to add interest with a fill in various measures. So you move hits around to create a fill, but then you realize you want fills in quite a few places…and maybe you tend to fall into doing the same kind of fills, so you want some fresh ideas.
Here’s the solution: Studio One 4.5’s Randomize menu, which can introduce random variations in velocity, note length, and other parameters. But what’s of interest for this application is the way Shuffle can move notes around on the timeline, while retaining the same pitch. This is great for drum parts.
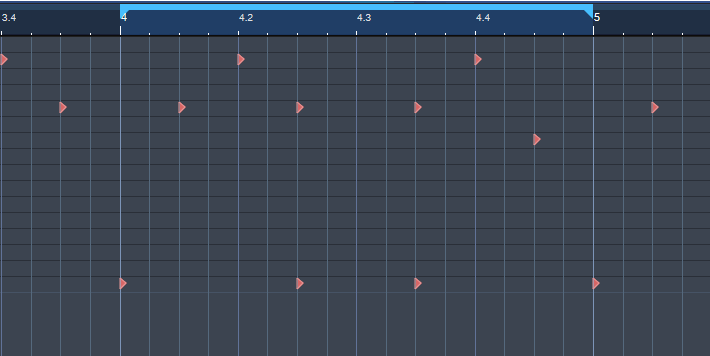
The following drum part has a really simple pattern in measure 4—let’s spice it up. The notes follow an 8th note rhythm; applying shuffle will retain the 8th note rhythm, but let’s suppose you want to shuffle the fills into 16th-note rhythms.
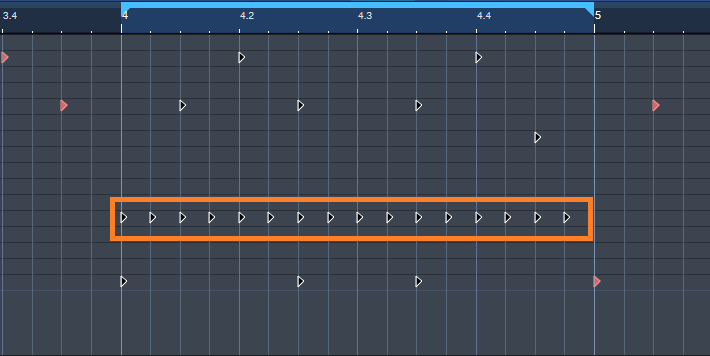
Here’s a cool trick for altering the rhythm. If you’re using Impact, mute a drum you’re not using, and enter a string of 16th notes for that drum (outlined in orange in the following image). Then select all the notes you want to shuffle.
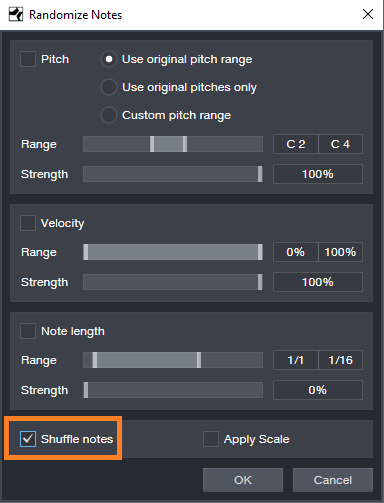
Go to the Action menu, and under Process, choose Randomize Notes. Next, click the box for Shuffle notes (outlined in orange).
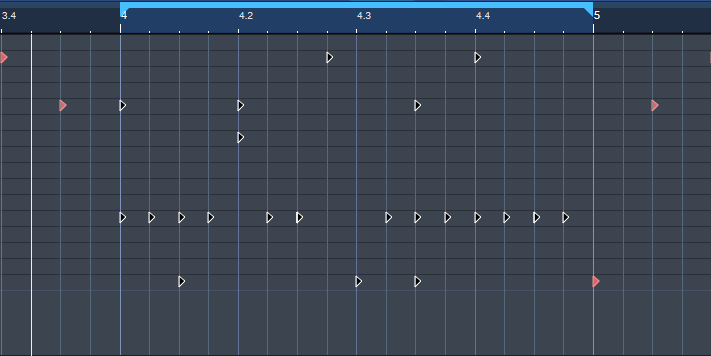
Click on OK, and the notes will be shuffled to create a new pattern. You won’t hear the “ghost” 16th notes triggering the silent drum, but they’ll affect the shuffle. Here’s the pattern after shuffling.
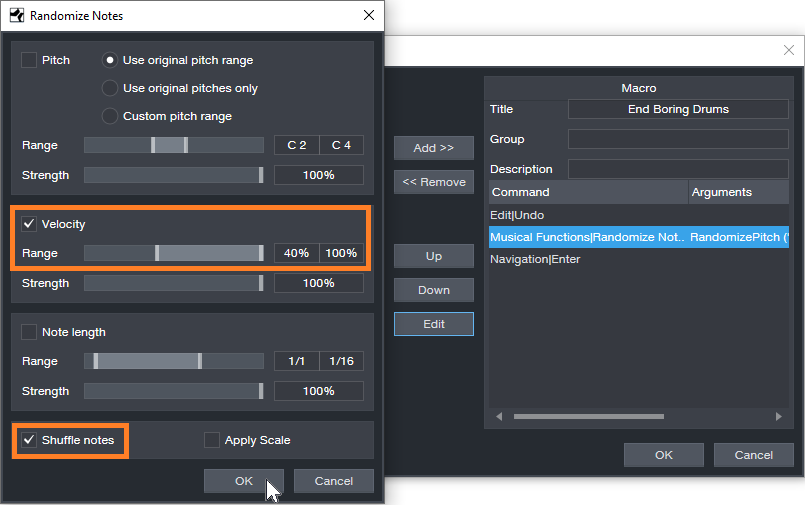
If you like what you hear from the randomization, great. But if not, adding a couple more hits manually might do what you need. However, you can also make the randomizing process really efficient by creating a Macro to Undo/Shuffle/hit Enter, as shown in the featured image at the top.
Create the Macro by clicking on Edit|Undo in the left column, and then choosing Add. Next, add Musical Functions|Randomize. For the Argument, check Shuffle notes; I also like to randomize Velocity between 40% and 100%. The last step in the Macro is Navigation|Enter. Finally, assign the Macro to a keyboard shortcut. I assigned it to Ctrl+Alt+E (as in, End Boring Drum Parts).
With the Macro, if you don’t like the results of the shuffle, then just hit the keyboard shortcut to initiate another shuffle…listen, decide, repeat as needed. (Note that you need to do the first in a series of shuffles manually, because the Macro starts with an Undo command.) It usually doesn’t take too many tries to come up with something cool, or that with minimum modifications, will do what you want. Once you have a fill you like, you can erase the ghost notes.
If the fill isn’t “dense” enough, no problem. Just add some extra kick, snare, etc. hits, do the first Randomize process, and then keep hitting the Macro keyboard shortcut until you hear a fill you like. Sometimes, drum hits will end up on the same note—this can actually be useful, by adding unanticipated dynamics.
Perhaps this sounds too good to be true, but try it. It’s never been easier to generate a bunch of fills—and then keep the ones you like best.