
Re-create the sound of those funky, wonderful blues clubs of the past— thanks to convolution reverb
Back in the 60s, my band opened for a lot of blues bands. And one of my fond memories (aside from Buddy Guy’s outstanding guitar tone!) was the sound of the club itself. These venues were often built for hundreds, not thousands, of people—and the hard walls, minimalist acoustic treatment, and sheer number of high-frequency-absorbing humans resulted in a special kind of ambience. I’d never been able to re-create this with conventional digital reverbs, but once convolution reverbs became affordable, there was hope. Now all I needed was an acoustic Impulse file to provide that sound, but when I couldn’t find any, it was time to go DIY rogue and make my own—you can too.
This may seem daunting, but if you know how to use a DAW it’s easier than it sounds. What’s more, the settings aren’t all that critical, so experiment—for example, if your “club” is bigger, increase the Impulse’s length. Here’s the step-by-step.
1. You’ll need a white noise sample that lasts around half a second to a second. This can come from a synthesizer bundled with your recording software, or from the internet (e.g., download from https://mc2method.org/white-noise/).
2. Load the sample into your recording software or digital audio editor, trim it to about 500 milliseconds, and insert two effects: EQ followed by Chorus (Fig. 1).
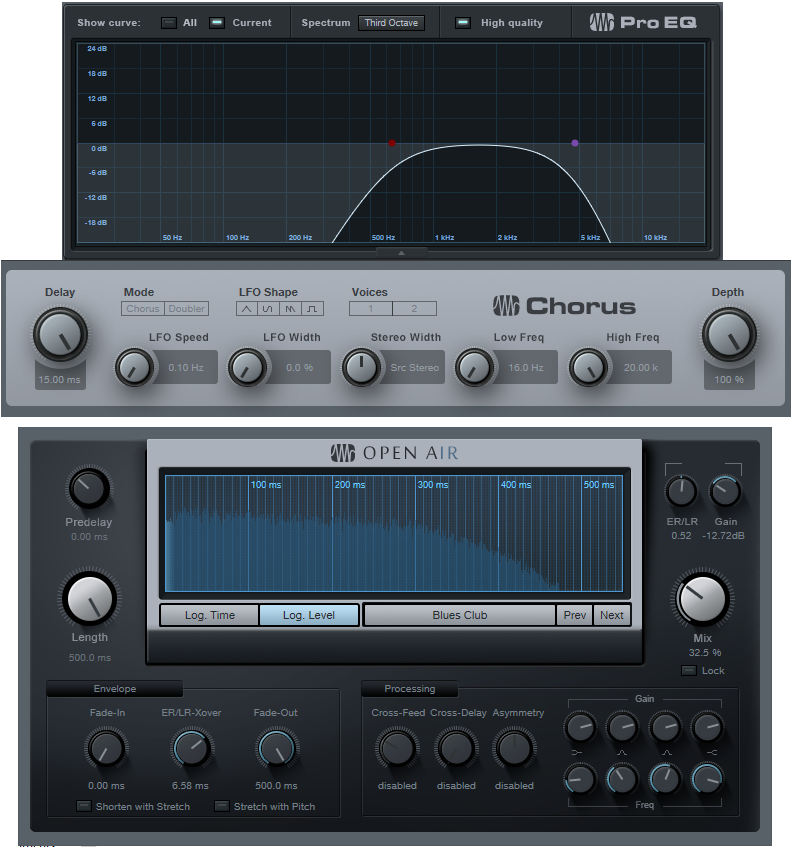
3. Filter out the noise’s lows and highs. Set a low-cut (high-pass) filter with a 24 dB/octave slope to around 700 Hz, and a high-cut (low-pass) filter with a 24 dB/octave (or higher) slope to around 4 to 5 kHz. The slopes and frequencies aren’t too critical, but these settings work well for me.
4. Add chorusing to create comb filtering anomalies that resemble room acoustics. The kind of chorus doesn’t matter too much, but set the initial delay to around 15 ms, LFO speed and width to the minimum possible (you don’t want modulation), and the mix to 50/50 delayed and straight sounds. With some chorus plug-ins that’s a mix setting of 50%, with others it’s 100%.
5. Add a concave (linear can work too) fade-out to the white noise clip starting at about 300 ms.
6. Bounce or export the clip so that it incorporates the effect from the signal processors and the fade-out, and then save the rendered clip as a WAV (or AIF) file.
7. Create a track for your guitar, load your favorite vintage amp sim sound, insert a little spring reverb if that’s your thing, and follow it with your convolution reverb.
8. Check your convolution reverb’s documentation to find out how to import an Impulse, then load the Impulse file you just exported. Time to play…tweak the reverb’s mix and other controls for the most vintage sound, then close your eyes—you just might feel you’ve been transported back in time, and about to hear Muddy Waters sing “No Escape from the Blues.”
(feature image by Philipp M. on Unsplash.com)