Get more out of Ableton Live with these useful tips
When asked what makes Ableton Live different, my response is that most DAWs are recording studios disguised as software, but Ableton Live is a musical instrument disguised as software. Let’s look at five hot tips to make life with Live even better.
OPTIMIZE LIVE PERFORMANCE EFFICIENCY
When using a laptop, there’s always a tradeoff: you can put your clips in RAM and use up your laptop’s system RAM, or try to stream all your loops from your laptop’s 5400 RPM system drive. But there’s a simple, “best of both worlds” solution: store your Live projects on USB memory sticks. Then you can persuade Live into thinking it’s streaming from disk, but the project has the advantage of being stored in RAM. Forget seek times, a hard disk’s mechanical limitations, or wearing out your SSD—here’s how to convert your project to one that works with USB RAM sticks.

- Plug your USB memory stick into your computer’s USB port.
- Call up the Live project you want to save on your RAM stick.
- Select “Save Live Set As,” navigate to your USB memory stick, then select Save.
- Choose File > Collect All and Save. When you’re asked to specify which media files are to be copied to the project, say Yes to all of them, then click OK (Fig. 1). If you’re using many instruments with multisamples, this can require a lot of memory. But if you’re mostly using audio loops, the average project will fit comfortably in a couple hundred megabytes.
- In Live, open the just-saved .ALS project file from the project folder on the USB RAM stick.
- Select all audio clips by drawing a rectangle around them or typing Ctrl-A.
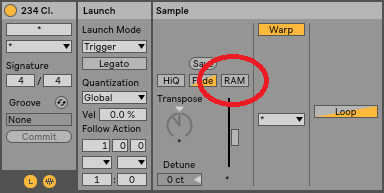
- Select Live’s Clip View, and under Sample, uncheck “RAM” (Fig. 2). This converts all the audio clips to “disk” clips that “stream” from your USB stick.
- Choose File > Save Live Set to re-save the project.
Now when you play your Live project, all your clips will play out of the USB stick’s RAM, and your laptop’s hard disk and RAM can take a vacation.
METRONOME MAKEOVER
You don’t have to put up with that generic metronome sound—use any metronome sound you want, because they’re just standard audio files. But Ableton doesn’t make them easy to find. For Windows, go to C:\ProgramData\Ableton\Live 10 Suite\Resources\Misc\Metronome\Samples (on the Mac, look inside Live’s Resources folder). Metronome.wav is the main file, MetronomeUp.wav is the downbeat (no, I have no idea why it wasn’t called MetronomeDown). Put the original samples in a folder within Samples in case you want to return to them later, and rename your new metronome sounds so Live recognizes them.
MIDI REMOTE CONTROL MAPPINGS
If you’re new to Ableton Live, you may find the process of mapping controller knobs and buttons to Live confusing if your controller isn’t supported by Live’s “Instant Mappings” functionality. If you do have a supported controller and select it in Preferences, it’s kind of magical how everything just works. But if you don’t have a supported controller, you need to override the instant mappings (Fig. 3).
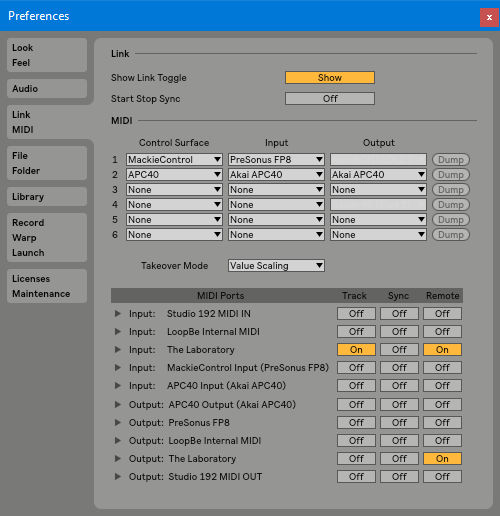
To do this, go to Preferences and make sure Remote is On for your controller under MIDI Ports (if you’ll also be using this controller to enter notes, enable On for Track as well). One more fine point: if the controller provides physical feedback like moving faders, or visual feedback like cool blinky lights, you’ll need to enable the Remote Out as well.
CHANGE PHASE THE EASY WAY
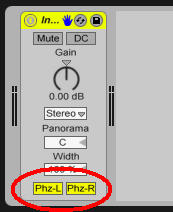
Live’s mixer channels don’t have phase buttons, but there’s an easy workaround: In the browser, look under Live Devices and find the Utility plug-in. Drag the Invert preset into the channel’s effects chain whose phase you want to change. The Phz-L and Phz-R buttons (Fig. 4) control whether phase is normal or inverted for the left and right channels respectively.
FREE WIRELESS REMOTE CONTROL
Although not as sophisticated as dedicated control apps, TeamViewer makes a remote desktop app that’s free for non-commercial use, and works with pretty much any mobile-friendly tablet or smartphone.
Go to teamviewer.com, download the computer app, and then go to the App Store or Google Play to download the mobile app. Open TeamViewer on your computer to show a partner code and password. Open TeamViewer on your mobile device, enter the partner code and password, and you’ll see the computer screen on your tablet or smartphone (Fig. 5).
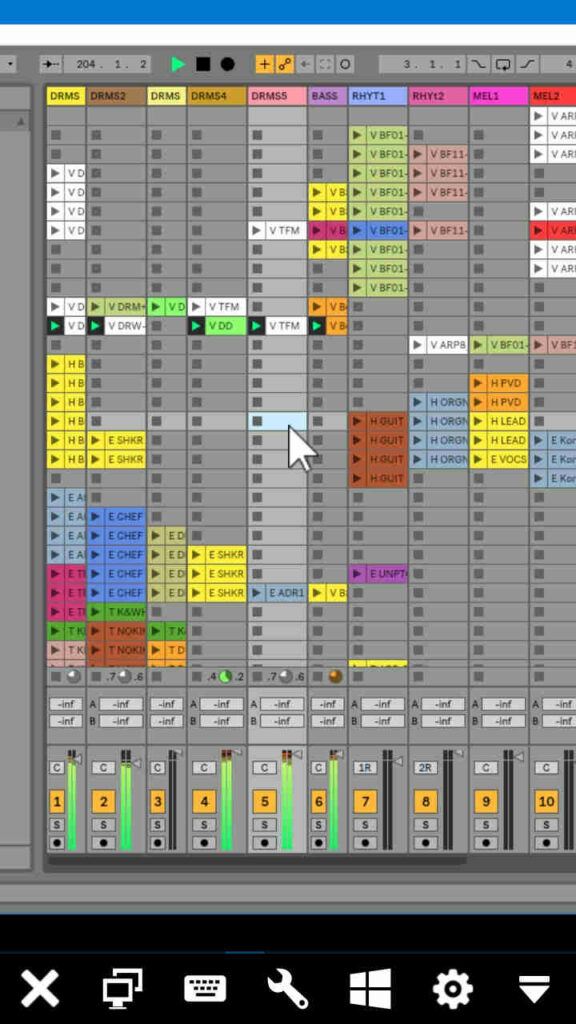
Note that this is not a full-function touchscreen; instead, you’ll see a cursor that you move to the parameter you want to control, and then tap. For example with transport control, move the cursor over the Play button and tap. Faders are a little klunkier. Move the cursor to the fader, tap, then move the cursor where you want the fader to end up and tap—the fader will jump to that position.
Despite these limitations, if the main reason you need a wireless remote is to adjust levels while recording in a vocal booth, control the transport, or trigger scenes, you really don’t need much else anyway.
RELATED ARTICLES
How to Scan Custom VST Folders in Ableton Live describes how to run VST3 plug-ins with Live.