Teach your bass to dominate the low end
There’s something about the massive sound of a good synth bass that’s hard to resist. And I also like the versatility, from serving as a weapon of mass distortion that provides the pit bull snarl behind a hardcore dance track, to a sweetly attacking rubber-band bass that lopes around a tender ballad. So, here are ten tips designed to help you get even more out of your synth bass.
1. PAN BASS FREQUENCIES TO CENTER
Bass frequencies are much less directional than high frequencies, so pan the low frequency elements to center. Spread any additional layers a bit to left or right, but don’t go too far away from the middle. This also provides more space for instruments like guitar, keyboards, and percussion, which can pan more to the left or right and not interfere with the bass. Also note that if you’re planning a release on vinyl, it’s imperative to keep the bass centered—otherwise the needle can literally jump out of the groove at high levels.
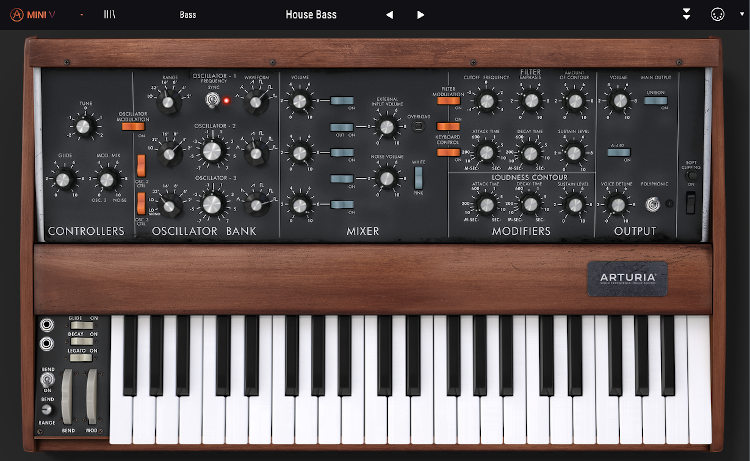
2. USE A BASS AMP SIM
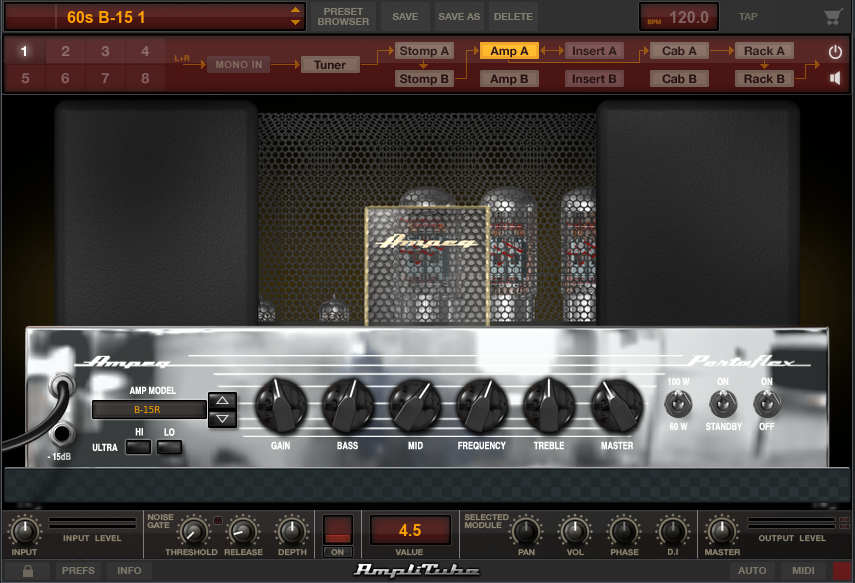
Whenever I arrived at a studio that had an Ampeg SVT (or B-15 or B-18) bass amp sitting in the corner, I was thrilled; these are classic amps that powered a zillion hits, from rock to R&B (Motown’s James Jamerson used a B-15B live—’nuff said). Putting a synth bass through these amps, then miking the amps, gives a sound you’ll never obtain by feeding your synth direct into the board; I tend to prefer dynamic mics for bass cabinets.
Finding those classic amps is not easy, although Loud Technologies took over Ampeg in 2005, and has resurrected several models. But if you’re more into software than hardware, IK Multimedia’s Ampeg SVX plug-in really does nail the sound; the bass amps in Native Instruments’ Guitar Rig 4, Line 6 POD Farm, and Waves G|T|R can also add serious character to keyboard bass synths.
3. BE VERY CAREFUL ABOUT LAYERING
If one bass sound is good, layering a second one is better…right? Not necessarily. What makes similarly-tuned layers sound rich is how their frequencies add and subtract as they go in and out of tune, which is fine for a string patch, but can weaken the low end. If you’re using layers, keep the lowest, primary layer at maximum level, and reduce the doubled layer by at least -6dB. However, layers set to different octaves are a whole other matter. Create a prominent main layer, add in a sub-bass layer an octave lower, then add an octave-higher layer with most of the highs taken off for a huge bass sound.
4. USE THE MOD WHEEL CREATIVELY
Really, how often do you need to add vibrato to a bass line? There are many more inventive—and musically useful—ways to use the mod wheel, such as:
- Bring in a sub-bass layer to emphasize really low frequencies.
- Tie the mod wheel to filter frequency so that moving the wheel away from you cuts the highs somewhat. That way, with something like a sawtooth wave-based patch, you can do a quick change from raw and rude to smooth and round.
- Control initial decay to change the attack from long to percussive.
- Layer something like a clavinet sound tuned down an octave, and use the mod wheel to bring this in and out.
5. ADD “PUNCH” TO BASS PRESETS
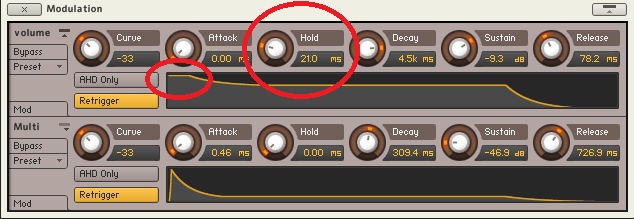
A Minimoog sounds punchy for several reasons, but a contributing factor is that the signal doesn’t decay immediately once the attack is complete; instead, it hangs at the maximum level for around 20-30ms before decaying. If your envelope generator has a hold function or can do rate/level envelopes, bingo: You have punch potential. In the image above, Hold is adding 21 ms of punch.
6. PARALLEL PROCESSING WITH BASS
When adding effects to your synth bass sound, like distortion or wa, it’s important not to thin out the bass sound. A better strategy is to split the bass sound, with one split carrying the unprocessed sound and panned to center, and the other feeding your processor of choice mixed in with the main sound. When recording with a DAW, you can copy the bass track and add an effect only to the copied track.
7. EVEN OUT BASS RESPONSE WITH COMPRESSION
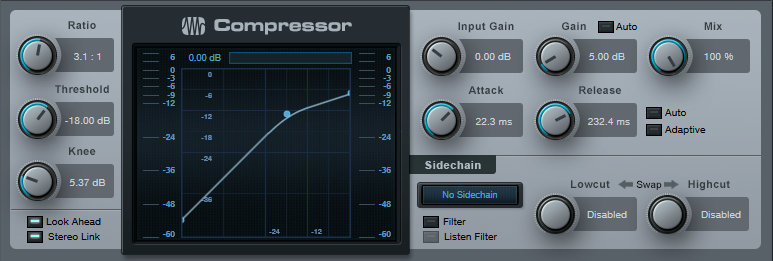
Your ears don’t hear as well at very low and very high frequencies, speakers tend to exhibit response anomalies in the bass range, and to add insult to injury, the typical, non-acoustically-treated room messes with the bass response because the wavelength of some bass frequencies might equal the size of your room. So, compress the bass a lot (a 3:1 ratio is a good start; adjust the threshold until you have about 10dB of gain reduction on peaks) because the more even it is, the better the odds of making through the acoustic obstacle course described above. Note that having a little bit of attack time—around 10-20ms—lets through a little more of the pluck, for a more “alive” sound.
8. USE EQ TO EMPHASIZE THE MOST IMPORTANT FREQUENCY RANGES
Don’t just rely on your synth filters; a slight low-end bump (around 80Hz) rounds out the bottom, while another slight boost in the upper midrange (2-3kHz) accentuates bite. And while we’re on the subject of EQ, sometimes it’s a good idea to roll off the low end of instruments that don’t have any signal in the bass range. There may still be low frequency components (including subsonic ones) that interfere with the bass.
9. ALTER TIMING WITH RESPECT TO THE KICK DRUM
Bass and kick inhabit the same frequency range, and sometimes share notes that hit at the same time. To emphasize the bass, slide it slightly ahead of the kick—just a few milliseconds will work. Conversely, to emphasize the kick, slide the bass a few milliseconds after the kick. Whichever track is ahead will sound slightly louder on playback, even if you haven’t touched the volume.
10. AVOID AMBIENCE IN MOST CASES
Reverb doesn’t like low frequencies, and besides, diffusing the sound takes away some of the bass’s force. But what can work is to add five or six very tight delays (in the 15-30ms range), mixed very subtly in the background (stereo will work because the level is so low). Multitap delays are good candidates, as are chorus effects that have multiple voices.
If you’re not familiar with multitap delays, these audio processors provide multiple delays (typically at least four) with their own delay times, feedback, pan, and mix. The taps can be set to rhythmically-related delay times, thus creating cool rhythmic effects, or to non-rhythmically related delays for a more diffused, randomized sound that can add depth to a sound source. If modulation is available for the delays, don’t add any (or just add a tiny bit), as these delays are designed to simulate the early reflections you get from a room. If the echoes don’t sound good, then they’re mixed too high.