This multiband processing technique converts multiband dynamics into a four-band crossover
Multiband processing can do all kinds of cool sounds, from the clarity and focus of multiband distortion, to the lushness of multiband chorusing. But first, you need to split your signal into multiple frequency bands, that that’s what this tip is all about: how to use a multiband dynamics plug-in, set for no compression, as a four-way crossover.
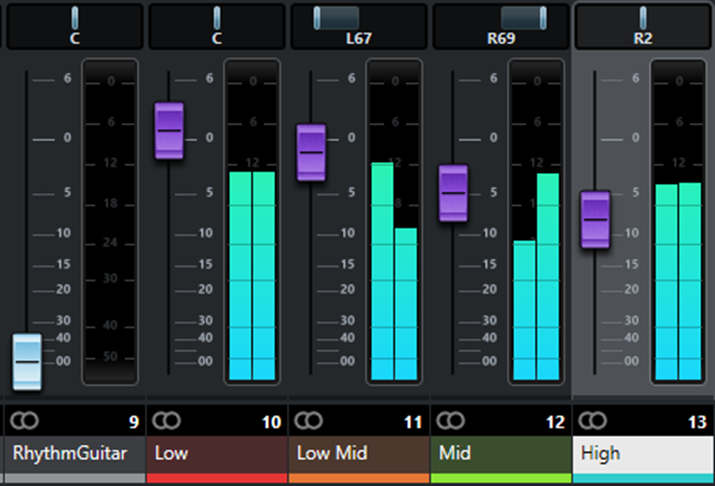
Fig. 1 shows how to do this in Cubase Pro, but the same technique works in any DAW as long as you can create sends and buses (or FX channels), and have a multiband dynamics processor, like a multiband compressor. (Note that if the mixer doesn’t look quite as expected, the image has been modified to save space by showing only the parts being described.)
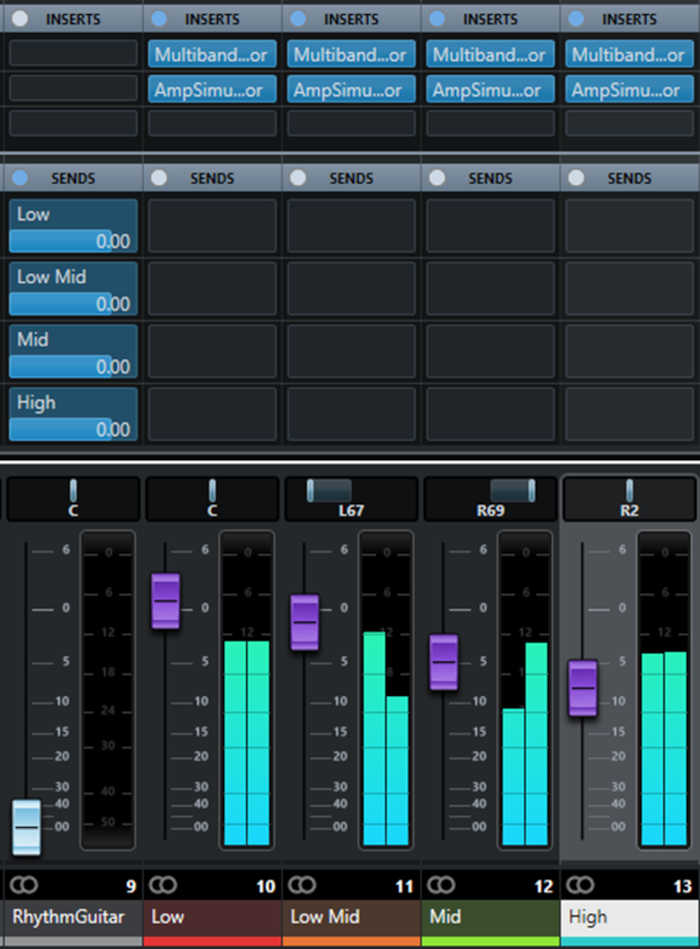
The Rhythm Guitar track on the left is being processed. It has four pre-fader sends, each of which feeds an FX channel that covers a different frequency band—low, low-mid, mid, and high. Each FX Channel has a MultibandCompressor followed by an AmpSimulator. The MultibandCompressor chooses the frequency range to be sent to the AmpStimulator.
Fig. 2 shows the MultibandCompressor setting for the low band. Note that the ratio is set to 1.0, which takes compression out of the picture. Of course, you might want to add compression at some point, but this is a good point of departure. Also note that the low band is soloed, while the higher bands are bypassed. This makes it easy to focus in on an individual band’s range for the best results.
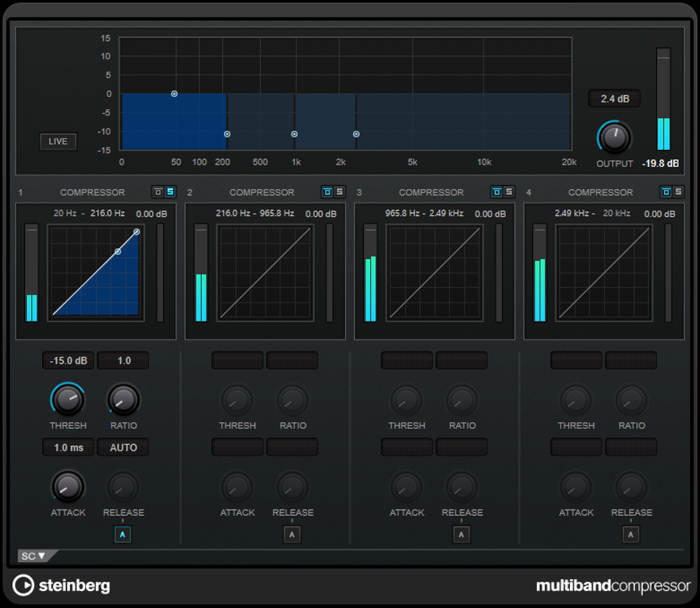
To save time setting up multiband distortion using a multiband compressor, solo the low band, and adjust the lowest split for the best bassy sound going through the amp sim. Then solo the lower-mids band, and adjust the next higher split for a good lower mid sound. Follow the same basic procedure for the mid and high band ranges. Now you can copy the multiband processor into each send, and the only tweak you’ll need to make is to solo each one for the desired band.
Once the individual bands are set up, you may want to include the same amp sim in each band but with different settings, and/or processors in some splits but not in others. Or you might want completely different processors in each split…you have a lot of options! Also note that the FX channels are panned, with the low and high bands centered, and the mid bands panned somewhat to give a big stereo image.