Choose the right equalizer for the right job in Cakewalk by BandLab
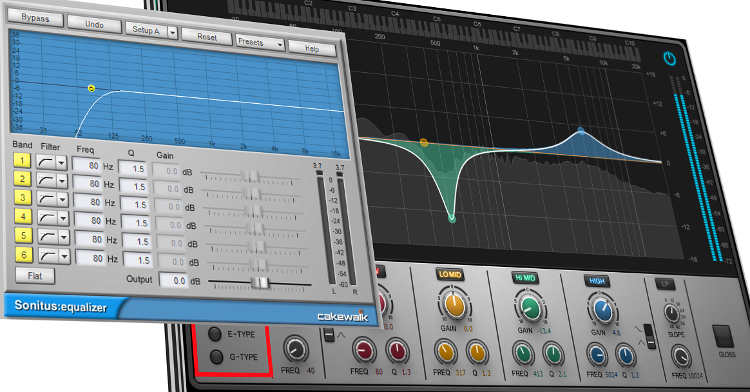
Cakewalk offers two main EQs, the QuadCurve and the Sonitus EQ. Why would you use one or the other? What are the differences? Is one “better” than the other? Let’s find out.
Testing EQs
EQs have different characters. Evaluating EQs using individual tracks or program material is essential, but the constantly varying nature of audio makes the evaluation process somewhat slippery. An alternative is feeding in a noise source. Because you can hear timbral differences very plainly, it’s easy to hear how various settings influence the sound nad overall “character.”
Cakewalk has a convenient noise source: insert the Sonitus:fx Surround plug-in into a track’s FX rack, turn the Test Noise button “On,” and place EQs after the noise generator. When checking out the ProChannel EQ, right-click on a ProChannel module header or on a blank space in the ProChannel, and select Post FX Rack.
Sonitus fx:EQ
Don’t dismiss this flexible six-band EQ because it’s old—it offers many useful features.
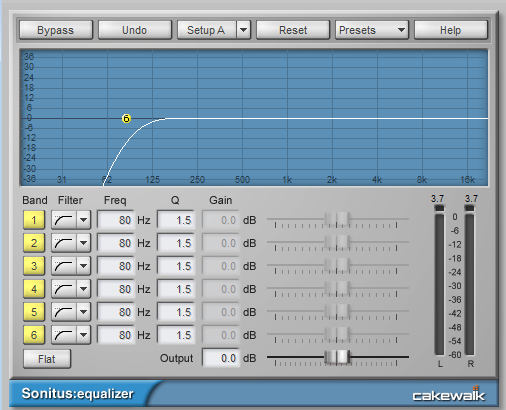
- All six stages can do high shelf, low shelf, peak/dip, highpass, or lowpass curves. Because the stages are effectively “in series,” enabling multiple highpass and lowpass curves creates extremely steep rolloffs. For example, stacking several highpass filters produces an effective pop filter (Fig. 1).

- To copy one stage’s parameters to another stage, right-click on the band number, and copy to any other band or all bands.
- Right-click within the graph to change resolution to +/- 5, 10, 20, or 40 dB. The +/- 5 dB range simplifies seeing subtle adjustments.
- The effect header offers a compare function via two different “setups,” and you can switch easily between them (as well as copy one setup to the other so you can compare small variations).
- There are several reset functions. “Flat” sets boost/cut to 0 but retains all other settings. Right-clicking on a band number gives the option to reset only that band to its default. The effect header’s “Reset” button chooses the EQ’s default settings.
- Ctrl+clicking on the yellow filter markers (or drawing a marquee around them) lets you move several simultaneously while maintaining a ratiometric frequency relationship. For example if Band 1 is 500 Hz and Band 2 is 2,000 Hz, if you select both and move Band 1 to 100 Hz, Band 2 will be at 400 Hz.
- With a frequency band marker selected, holding Shift and dragging left or right (or varying the mouse scroll wheel) adjusts Q.
The Sonitus fx:EQ has only one algorithm, a “digital” EQ curve—there’s no attempt to duplicate the anomalies of analog EQs. Although you can wrestle it into being more of a “character” EQ, the QuadCurve is better for that application. I use the Sonitus fx:EQ primarily as a quick, easy solution for problem-solving (e.g., getting rid of an unwanted resonance) or as a Clip effect. Because of the low CPU consumption, it’s also useful in FX chains that require a lot of frequency response tailoring, like notching out “fizzy” frequencies with guitar amp sims.
ProChannel QuadCurve
You’ll often see posts in pro audio forums from people who like the “sound” of one EQ more than another. This can be due to a variety of factors, like whether an EQ is trying to emulate a specific analog characteristic, but it can also relate to the type of EQ curve chosen by the plug-in manufacturer.
Analog EQ design involves multiple design tradeoffs, and these tradeoff help contribute to an EQ’s “character.” For example, maybe you’d trade off a steeper slope for more passband ripple; constant-Q designs were different from non-constant Q; and so on. We don’t need to cover the technical details—suffice it to say a digital EQ that emulates one particular type of analog EQ curve is indeed going to sound “different” compared to a digital EQ that emulates a different analog EQ curve. That doesn’t mean a particular EQ plug-in is inherently better, but it could be better for a specific application.
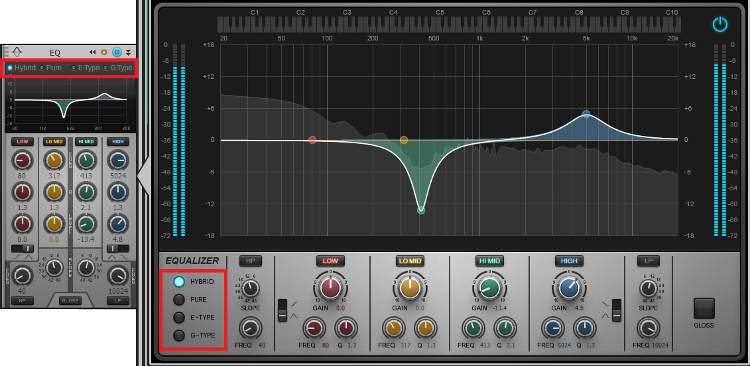
The QuadCurve’s four different curves make it my go-to EQ for most purposes, not just because of the “clean” sound but because it’s easy to choose an appropriate curve rather than try to create one in the Sontius fx:EQ. However choosing the right curve means understanding how each curve affects the sound (just clicking the different options and picking the “one that sounds best” isn’t exactly a strategy), which is why I recommend spending some time auditioning each EQ curve.

Cakewalk’s help describes the technical differences among the various EQs, as well as subjective impressions and descriptions, so we needn’t repeat that material here. However to give meaning to these descriptions, feed some noise through the settings shown in the screen shot, then try the different curves and listen to what happens as you change the various parameters.
- The Hybrid’s cut is much sharper than the other curves, while the boost is fairly moderate—this would be the EQ to use on drums if you wanted to tame a resonance but also boost a wider range of frequencies.
- The Pure type is broad and gentle—very much like Pultec emulations (in many cases this curve will do what you need without changing a sound’s inherent character).
- The E-Type sort of “splits the difference” between the Hybrid and Pure types.
- The G-Type resembles the Pure’s characteristics, but with a broader cut and narrower boost.
PX-64 and VX-64 Equalizers
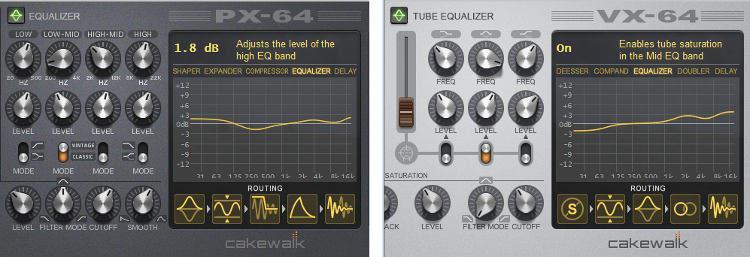
Finally, don’t ignore the “character” EQ options designed for drums (PX-64) and voice (VX-64) in these You may still need additional EQ, but these will provide a good starting point.

