Ripple editing has always been crucial for video editing – find out how it can be equally valuable for audio
Ripple editing was developed for use with video editing. Consider a situation where you have video, narration, and music. You want to cut 15 seconds of the video. Wouldn’t it be convenient if that also cut the narration and music, and then closed up the gap that was created by removing the video? In a nutshell, that’s what ripple editing is about—the edit “ripples down” to other parts of the project.
For a more formal definition, ripple editing automatically moves content on the timeline after performing edits that add or remove time, thus completing some editing operations automatically. For example if you remove a section of a song, the “hole” that’s created closes up automatically so the beginning and ending of the cut section join together. Or, if you take the part you cut and paste it, the song will open up enough space to hold what you want to paste—it’s not necessary to open a space, and then paste. In a way, you can think of ripple editing as editing a DAW’s timeline, and the audio clips go along for the ride.
In addition to being extremely useful when doing arrangements, this functionality is also great for assembling album song orders when mastering. You can move song clips around to try out different song orders, and the other songs will automatically open up to accommodate new song placement, while closing up where the clip used to be.
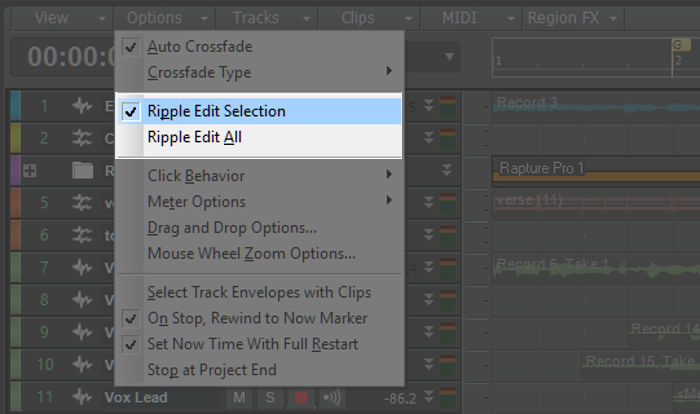
You’ll generally find at least two ripple editing options—one that ripple edits only what’s selected, and one that applies ripple editing to everything. As examples, suppose you move a clip from measure 3 to measure 5. If you’ve selected ripple edit everything, all clips on all tracks after measure 3 will move two measures to the right. If you chose to ripple edit only a chosen selection, only the clips on the track where you moved the clip will move two measures to the right.
However, be aware of the power of ripple editing: If you have it selected, forget to turn it off, and want to cut something like the end of a clip, you might cause everything past the clip to move forward on the timeline. The best practice for ripple editing is to enable it when required to make an edit, but then turn it off after the edit is complete to avoid any unintended consequences.
Following are some examples of how ripple edits work for both ripple edit “all” and ripple edit “selected.”
RIPPLE EDIT SELECTED
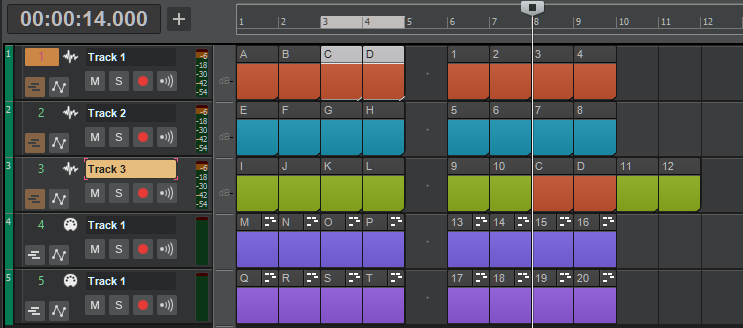
In the following example based on Cakewalk by BandLab, clips C+D in the left group have been copied. Placing the focus on Track 3, inserting the cursor at measure 8, and choosing Paste pastes C+D on Track 3 starting at the cursor, and pushes clips 11 + 12 to the right to make room.
Next, let’s Cut clips F, G, J, and K from the above screen shot. See the resulting screen shot below; the clips to the right of G have shifted to the left starting where F had been, and the clips to the right of K have shifted to the left starting where J had been.
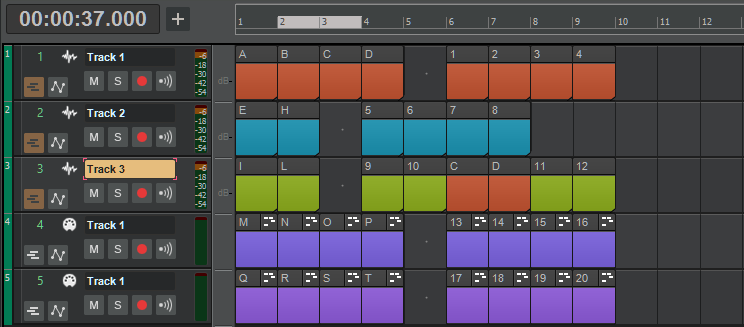
Now move the H clip to the right by two measures. Everything in the track to the right of it—the blank measure and clips 6, 7, 8, and 9—also move to the right by two measures.

RIPPLE EDIT ALL
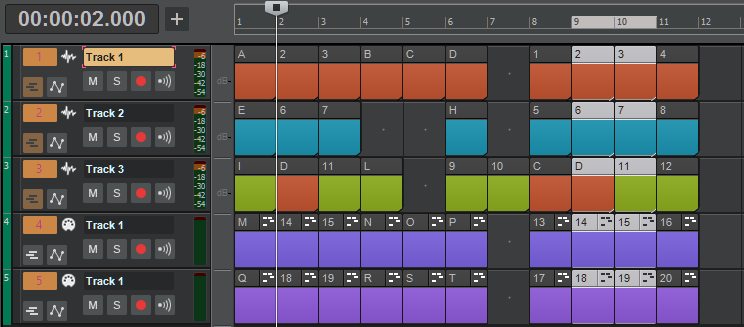
Next, suppose you want to copy clips 2, 3, 6, 7, D, 11, 14, 15, 18, and 19—the measures in the middle of the right group above—and insert them at measure 2. Select the measures you want to insert, copy them, place the cursor at measure 2, choose Track 1 as the focus (i.e., the highest-numbered track of the selection), and paste. The screen shot below shows the result.
Hopefully, this gives you an idea of how ripple editing can be a real time-saver when doing edits. Just remember – turn off ripple editing when you’re done with your edits! Otherwise, you just might end up shifting things all over the timeline in ways you never intended.