It used to be difficult to do reverse tape – but now it’s easy to get that effect
During the psychedelic music era of the 60s, the “backwards tape” process reversed instrument notes so that instead of fading out from an attack, they faded in to an attack. Sometimes it seems just about every major band took advantage of backwards tape effects—not just the Beatles, but also the Rolling Stones, the Byrds, Pink Floyd, Mandrake, and many others.
HOW THE EFFECT WAS DONE WITH TAPE
Anyone up for a history lesson? To do this with tape, you flipped the supply and takeup reels so that the tape traveled in reverse, from the end of the song to the beginning. You’d then play along with the reversed sound, and record your playing in a spare track. Note that when overdubbing, you had to be careful not to record over an existing track, because flipping the reels also flipped the track numbers. For example, with an 8-track recorder, track 1 became track 8 when reversed. Flipping the reels back restored normal tape travel, while reversing the guitar part you overdubbed.
BACKWARDS TAPE IN THE DIGITAL WORLD
Interestingly, this effect is used rarely in today’s music, yet it’s so much easier to do than it was in the days of tape. Most DAWs have a DSP function that reverses audio, and it’s useful for more than just creating subliminal backwards satanic messages (yes, I am kidding). Reversing audio is invariably a “destructive” edit in the sense that it’s not real time, but instead alters a piece of audio for playback.
Because the backwards tape effect isn’t particularly rhythmic, you can often get away with just noodling around, reversing the part, then sliding the audio on the timeline until it more or less fits the rest of the music. But to take the backwards tape effect to the next level, here’s a recommended procedure for lead guitar.
- Before you get involved in reversing anything, record a lead guitar part that sounds great, and fits the music well.
- Create a premix of your existing tracks, including the guitar solo. Mix the solo higher than normal.
- Use DSP to reverse the premix.
- Solo the premix.
- Play along as closely as possible to the guitar solo, which is now reversed. It won’t be easy, but the objective is to remember that the solo’s structure needs to be reversed—for example if the solo builds toward the end by going up a scale, when recording the part to be reversed you need to start with the highest note and go down the scale. Often a dry guitar part is best, not a part with distortion or sustain, because any sustain will work against a dramatic backwards effect when the part’s reversed.
- Turn off solo for the reversed premix track and mute it.
- Reverse the guitar solo using DSP, and shift its position on the timeline to line up with the scratch guitar track. It likely won’t line up exactly, but tweak the track position so it lines up as rhythmically as possible with the song.
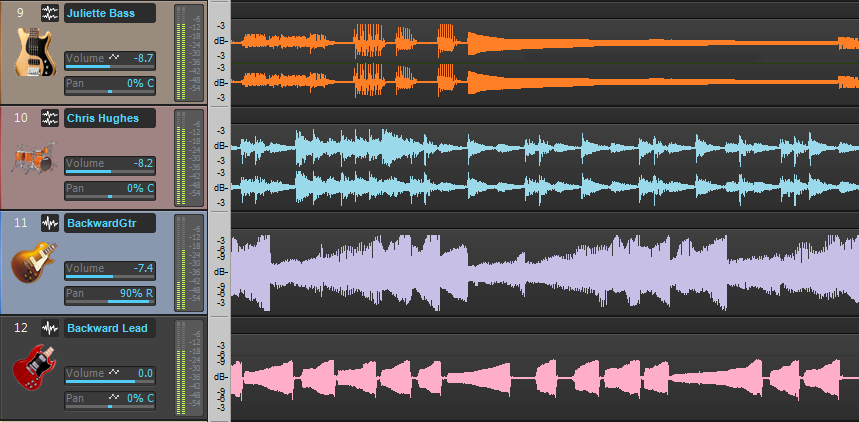
Referring to the featured image above, when lining up the reversed track, often the reversed notes lead up to the beat. Note the standard decay in the top two tracks with bass and drums, and the reversed notes in the lower two tracks that contain rhythm and lead guitar parts.
Adding some echo or reverb can be very effective (and was often used back in the 60s to augment backwards tape parts). You might also find when recording dry guitar that the backward effect is too pronounced, leading to an excessive amount of “snap” at the reversed note’s end. The fix is to use a transient shaper effect, which can soften the part’s attack somewhat, prior to reversing the part you recorded.
To hear an audio example of a track with backwards lead and rhythm guitar parts, all created using DSP functions within a DAW, go to http://www.youtube.com/watch?v=RuE55rwiQ9s.