You have a lot of choices, so make sure you choose the one that’s right for you
There have never been more choices available for audio interfaces. The good news is that it’s almost impossible to choose a “bad” audio interface, but with these many choices, you have to make sure you choose an appropriate one.
Audio interfaces fall into two general categories: those designed for individual applications, like a home studio, and those oriented toward networked, commercial applications, like AVB, Dante, and MADI. Networked interfaces are a whole other world, so we’ll stick to audio interfaces designed for typical home and project studios.
COMPATIBILITY: YOUR FIRST CONSIDERATION
Your computer will likely offer multiple ports. These can include USB, Thunderbolt, and for older computers, FireWire. Your interface has to be compatible with whatever port is available. FireWire was the interface of choice years ago, but has since been eclipsed. However, this also means that if your computer can use FireWire, you can pick up what was once a top-of-the-line interface for pennies on the dollar at sites like reverb.com and eBay. Just make sure that any needed drivers are compatible with your operating system.
USB 2.0 is a common audio interface option. USB 3.0 and USB 3.1 (also called USB-C, after the connector it uses; see Fig. 1) offer somewhat higher performance.
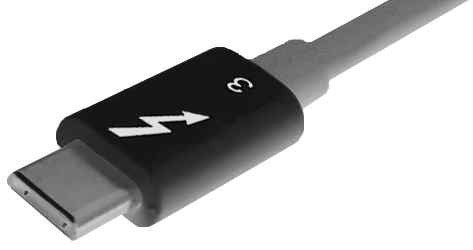
Note that some USB-C interfaces run at USB 2.0 speeds, but are compatible with USB-C ports. Thunderbolt ports, found mainly on Mac computers, is the highest-performing protocol but also the most costly. Although several Windows computers support Thunderbolt, it’s important to check the interface manufacturer’s web site for compatibility info for your specific computer setup (e.g., motherboard and chip set). Not all Thunderbolt-friendly Windows machines are compatible with all Thunderbolt interfaces. For example, Universal Audio has support docs on their web site for Windows-based computers that cover compatibility, the steps needed to configure your computer, and adapters and computers to avoid until further notice.
DOES LATENCY MATTER?
Musicians expect to hit a string, key, or drum and hear a sound, but computers introduce a short delay between the time a signal enters your interface, and the time it leaves the computer. This results from latency, the tech name for the delay that occurs in the conversion process from analog to digital and digital to analog, as well as in the computer itself—even the most powerful processor can only do so many millions of calculations per second, and sometimes it can’t keep up. Virtual instruments, not just incoming audio, are also subject to latency because of the intense processing required to produce complex sounds in real time.
To avoid running out of audio, the computer stores some of the incoming audio in a buffer, which is like an audio savings account. When the computer is so busy elsewhere that it can’t deal with audio, your recording software makes a “withdrawal” from the buffer instead. The larger the buffer, the less likely the computer will run out of audio data when it needs it. The trade-off is that a larger buffer diverts the audio for a longer period of time to keep the buffer filled, which increases latency.
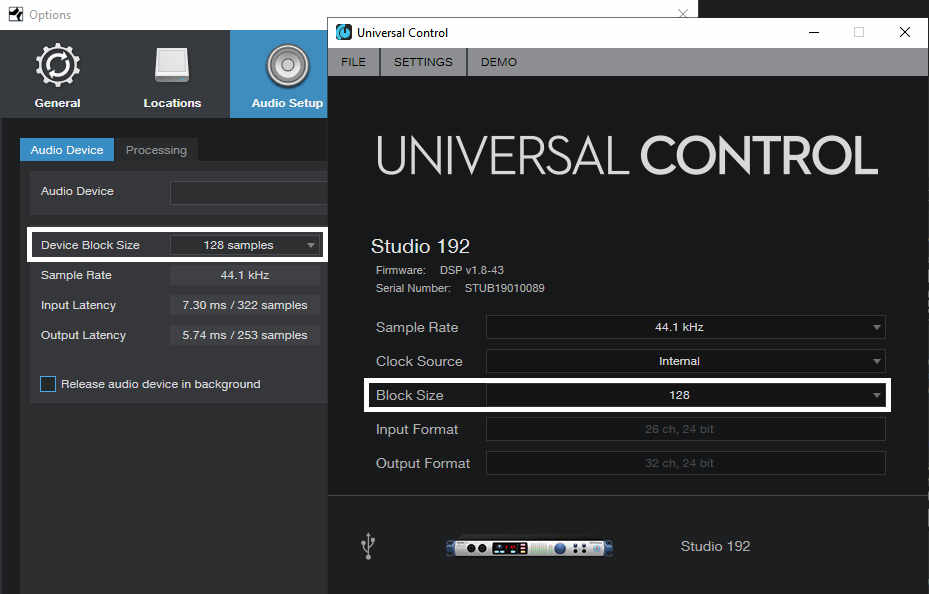
You specify latency in the control panel for your audio interface, or within your host program (Fig. 2). Latency is usually specified in samples (the individual measurements of the input signal, as created by the process of converting analog into digital data), or milliseconds (a millisecond, abbreviated ms, equals 1/1,000th of a second). Choose the lowest setting possible consistent with no audio problems. If you hear distortion, crackling, or if the audio application stops or freezes, then it’s likely you need to increase the latency.
In general, USB 2.0 has sufficiently low latency to cover the vast majority of studio needs. With a relatively modern computer and well-written interface drivers, typical latencies are under 10 ms. But if you’re willing to pay the premium for Thunderbolt, you’ll experience the lowest possible latency (i.e., the computer processing-induced delay that occurs between a signal arriving at the interface’s input and exiting the output).
However, if there are a few milliseconds of latency, don’t worry. Every millisecond is like moving one foot away from a speaker, so 10 milliseconds of latency is like being 10 feet away from a guitar amp. Wearing headphones instead of listening over speakers reduces latency, and some interfaces offer zero-latency monitoring. This means that you monitor the signal going into the interface instead of the signal coming out of it, although the tradeoff is you won’t hear the effects of any processing done within the computer, like amp sims for guitar.
BACKWARD COMPATIBILITY ISSUES
If you have a computer with a USB 2.0 port or a Mac with a Thunderbolt 2 port, but plan to upgrade to a newer computer, it’s probably safe for you to get a USB 3.0 or Thunderbolt 3 interface. Although these won’t deliver the same performance as the latest port protocols (for example, a USB 3.0 interface will operate at USB 2.0 speeds with a USB 2.0 port), they’re almost always compatible. However, you may need an adapter. USB-C connectors would require an adapter to work with a USB 2.0 port, and with Thunderbolt, you’ll need an adapter like the Apple Thunder 3-to-2 (Fig. 3).

Also remember that the advantages of higher speeds may or may not matter. A USB 3.0 interface won’t be that much faster than a USB 2.0 interface; the main advantage is being able to stream more channels of audio at higher sample rates. If you’re a singer/songwriter working solo, USB 2.0 will likely do what you need but if your gig is doing live recording at 96 kHz, you may benefit from USB 3.0 or Thunderbolt.
BUY AUDIO INTERFACE PERFORMANCE, NOT MARKETING
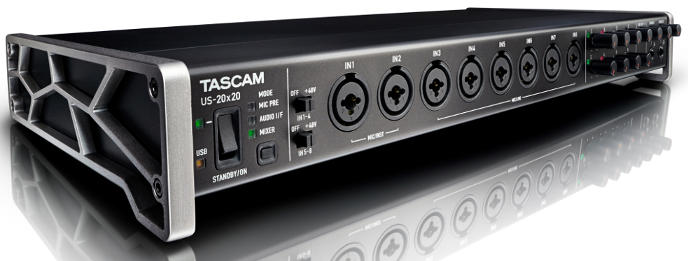
The audio interface market is extremely competitive, and the components used these days are almost always of a uniformly high quality within a given price range. As a result, less-recognized brand names often give high performance at low prices to try to cut into the market share of the “big guys.” For example, the TASCAM US-20×20 USB 3.0 interface (Fig. 4) is quite inexpensive, and can also serve as a digital mixer.
And there are interfaces that fly “under the radar,” like the QSC TouchMix series mixers. Created originally as a mixer, when doing live recording it can stream 32 channels into your Mac or Windows computer, and/or serve as an audio interface with DSP and touchscreen operation in the studio. These are just a few examples—there are a lot of choices, like mixers with USB interfaces like those made by PreSonus and others, that may not be obvious until you do a little digging.
EXPANSION OPTIONS FOR INTERFACES
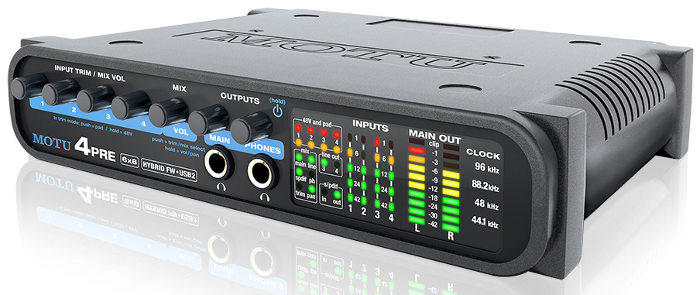
You’ll always need more inputs than you think you will. On the Mac, it’s easy to aggregate multiple interfaces, and essentially create one giant interface. You can do it with Windows too if you use the native Windows audio drivers (like WASAPI), but most recording enthusiasts prefer the higher-performance ASIO drivers for Windows. Although you can aggregate some ASIO interfaces, a simpler strategy is to look for an audio interface with an ADAT optical input port. At 44.1 or 48 kHz, you can feed eight channels of audio (or typically, fewer channels at higher sample rates) from an octal mic preamp with an ADAT output, like the MOTU 8pre USB (Fig. 5).

DEFINE YOUR NEEDS CAREFULLY
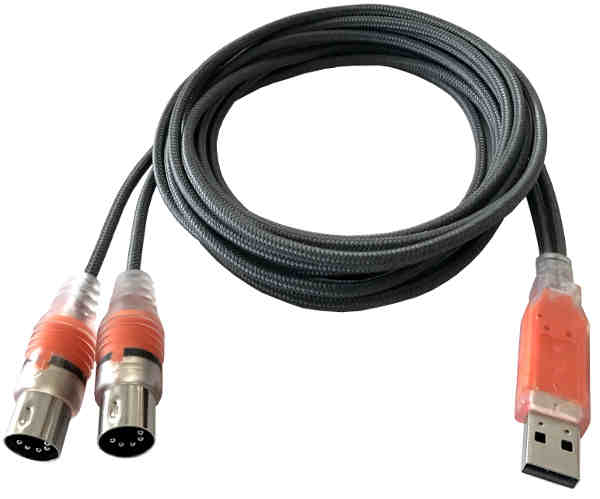
It’s important to spend some time thinking about your needs. For example, if you have older MIDI gear with 5-pin DIN connectors, an interface that includes those connectors means you won’t have to buy a separate MIDI interface. Then again, if you find the perfect audio interface but it doesn’t have a 5-pin DIN connector, you can use a USB-to-MIDI adapter cable like Esi’s MIDIMate Ex (Fig. 6) for basic applications. If you need or a full-blown interface with 10 MIDI ports, units like the iConnectivity MIO10 are ideal.
Also consider your audio needs—do you need more XLR mic inputs, more 1/4” TRS line inputs, or combi jacks that offer the option to use both? Interfaces with the latter may cost a bit more, but be better-suited to your requirements.
Think about your typical sessions, and what you need. Also bear in mind that even if you’re a solo artist, have an interface with lots of inputs will probably eliminate the need to do any patching—you can leave your instruments set up and ready to go, at a moment’s notice.
In any event, there’s pretty much an interface for every application, so all you need to do is figure out what your application, and then start your search for the most appropriate solution.